Google Ziets' Yeast and Sourdough Baking Page

Wednesday 11 December 2013

Crossing Another Mental Hurdle: Multigrain Sourdough Loaf


Interesting how we all learn mostly from our own experience. Edward de Bono has written at length about the thinking process and thinking mistakes. And somewhere the idea emerges that problem solving is a process that will get you back to where you were. Progress requires different thinking.

And so it is with me too. I wrote a whole blog post describing a way to get out of a thinking rut in the realm of photography. Then, in the wee hours of the morning when everything is quiet except for the noises from the southeaster howling outside, it dawned on me that perhaps I am in a baking rut too. In a way of speaking.

Nothing out of the ordinary, nothing really wrong. But a definite feeling of having to do something new, something out of the ordinary.

Later that morning, after the early morning chores had been attended to, I opened my copy of Crust And Crumb by Peter Reinhart. The book is a veritable treasure trove on the various processes going on inside the dough. Worth reading several times and keeping it as a ready reference when planning your next loaf.

I decided on a multigrain sourdough loaf. Just for the difference in process and a new way of preparing the dough. I have never made bread that took longer than a morning or so, from preparing and kneading the dough until the baking is done. This was a going to be a first for me.


This blog post also linked to Yeastspotting!

Authored by Johan Zietsman

Last updated on 2013-12-12

Friday 22 November 2013

Home Baked Bread: A High Fibre Loaf

At last I am back in my favourite kitchen. Home. After two months away and many culinary adventures later, I am back in my own homely little kitchen.
The words do have a cosy ring to it, much like the Mole's place in The Wind In The Willows by Kenneth Grahame. Your own place has this feeling of home.
Having been away for so long, I had this primordial urge for proper bread. I crossed a mental hurdle just before my departure on the last voyage, so the missus hasn't tasted the version of bread I now bake. I purchased a copy of Peter Reinhart's book The Bread Baker's Apprentice some time ago and studied it. You have to open and study the book.

Which means reading intensively several times. Especially the part about what happens when you start mixing flour, water, salt and yeast. I had ample chance to experiment on the voyage, mostly successfully and often very successfully. The challah I made on board could be the best loaf I made to date. I shall certainly strive to top that one. This time around I decided on a plain and simple loaf. Light Wheat Bread is the heading in the book. The recipe in the book requires whole wheat flour. I do not have flour with crushed wheat, so I used brown bread flour instead. The flours that I use are whole grain, stone ground, unbleached, non-GMO anyway, with the brown bread flour having ample wheat husks to give the loaf a rustic coarseness. Long words to describe decent, old fashioned coarse flour.


This blog post moved to the link below as part of consolidation. Thank you for your patience.

Tuesday 27 August 2013

Sourdough Coconut Rice Pancakes


Sometimes it is good to stick your neck out. Not in an ugly or untoward way. More like an adventure.

I rather like adventures. They bring you to the end of your comfort zone. And then, perchance,  take you across those borders. Stretching your limits, extending your experience and abilities. And next time it is not so fearsome to go there any more. I am told by my psychology friends that you tend to compare present situations to your  past experiences before making decisions. Mostly in  unconscious ways.

Adventure, on the other hand, takes you into the unknown in a fully conscious way. You make a deliberate decision and then just carry on regardless.

It can get quite exciting, after a fashion.

Well, I did exactly this as part of my sourdough experimentation. The internet group Sourdough Surprises has a monthly challenge for dishes using sourdough. I thought this could turn into some culinary adventure, why not try it.

The challenge on hand is to make sourdough pancakes. Perhaps with the accent on the filling or sauce, rather than the pancakes themselves.

I reasoned that putting most of the accent on the filling, one would end up with a challenge on the sauce. Not overly sourdough, methinks.


So I surfed the net and got to appam. A sourdough pancake made from rice. A very popular dish in some southern Indian states. And very easy, given that it can be made without fancy equipment and processes.

I have a batch of apples fermenting merrily as part of my greater effort in catching more wild yeasts. These were picked from the tree, no additives, preservatives or wax to kill the natural yeast on the skin.

I have made appam before, also as an experiment. The full story can be read in a previous blog post. At that time I decided to take a short cut and use baking powder as the leavening agent. It worked a treat and cut the time from start to plate by a huge margin. This time I went the traditional way.

I soaked the rice (¾ cup) for eight hours before blitzing it in the blender to a fine pulp. Enough for a dinner for two. The  blended soak was then inoculated with some fermenting apple water. This lot was left overnight as per the traditional method. I digressed from the traditional recipe (there is a plethora of these recipes on the net) which calls for a self-fermenting process. As it is still winter here in the Cape of Storms, I decided that it would be prudent to help nature a bit and force a start to the fermentation using my known ferment. ( Well, at least I know it is an active yeast!)


Twelve hours later I added three dessert spoons of dessicated coconut, a pinch of salt and one egg, beaten.

This lot was bubbling away merrily before I added the additional ingredients. The full mix batter was then left for three hours to ferment a little more. By this time there was a lot of bubbles, but the batter seemed to separate a bit.

Adventure, no less!

I ignored that  part, reasoning that I shall stir the batter up each time before scooping a ladle full into the frying pan. The batter needs to be about the same consistency as for normal pancake. This batter is a bit more coarse than normal flour and it has no gluten. Therefore the pancake will be brittle, not elastic as one would expect from wheat flour. I added the egg to help bind the batter.

These pancakes came out brilliantly. You pour a little batter into a hot frying pan, then swirl the batter around to make nice patterns. I use a non-stick pan, so there is no fat involved. The pancake is left on its own to cook until it comes loose from the pan by itself. You shake the pan a bit when you think the time is right. By this time the bottom of the pancake will have turned a beautiful shade of brown caramel. A quick flip to cook the top will take the pancake to perfection. These do not really stick to the pan as there is no additional sugar in the mix. And the coconut helps to give a beautiful caramelised colour and taste.


I served these with a fast chicken curry called balti chicken. Compliments of the good offices of a fellow food blogger from Pakistan by the name of Maria Nasir. This dish is also very easy to prepare and it would be remiss of me not to point you directly to the recipe.

The chicken dish goes extremely well with the appam. There is a very yeasty sourness in the pancakes, delicious on its own. The curry complements the flavours and you end up with a sensual dish which is easy to prepare.

And so ends my culinary adventure. This time I gained a lot of confidence in the wild yeasts I am using in my culinary experiments. The flavours are exquisite and I am getting some idea of how the yeast flavours go with food.

And in spite of all my misgivings about the batter, the yeast performed as expected. The pancakes come out a bit chewy as a result of using dessicated coconut. The previous batch was made with coconut powder, which gives a finer texture. It is up to the cook to decide on which way to go, yeast or baking powder.

But the yeast version has the better taste...


Authored by Johan Zietsman.

Last updated on 2013-08-27.

This blog post also linked to Yeastspotting!

Sunday 18 August 2013

Raisin Sourdough Rusks: Very Traditional South African Fare


Ever had rusks with your coffee?


If you have been to South Africa or live there, you will know that these hard biscuits are almost inescapable. Together with coffee and biltong (beef jerky), rusks make up a full camping meal. Or a light breakfast.

I have reason to believe that these may have originated from dried bread supplied to the ships sailing around the Cape in the days of yore. Before refrigeration and the internal combustion engine. They would then naturally be part of the fare that the Voortrekkers of old took on their long treks in ox wagons into the harsh South African hinterland in 1838.


Light food to pack, if a bit bulky. But they will last almost indefinitely as long as you keep them dry.

Nowadays you find them in all grocers as well as most of t
he craft food stalls and bakers. And rusks are available in a myriad of styles.

The raisin water that started it all.

All using instant yeast or commercial yeast of some nature.


So I decided that it is time for some microbiology. An experiment to catch a yeast from raisins, then use that to make rusks in the traditional South African style.

These are called mosbolletjies, after the fermenting grape mush that they were first made of. The Cape had lots of grain and lots of grapes, even in those bygone days, so it was natural to use the fermented grapes in a sourdough starter.


I resorted to raisins. Bought them from my nearest grocer. Big mistake. It took almost a week before anything happened. Even after spiking the watery raisins with some brown sugar. Then it dawned on me that the raisin packers would take measures for the raisins not to ferment or go off in some other way. Therefore the raisins would be treated with a layer of wax after being washed, and possibly irradiated, to kill all germs, yeasts, bacteria and other flora generally mostly good for you.

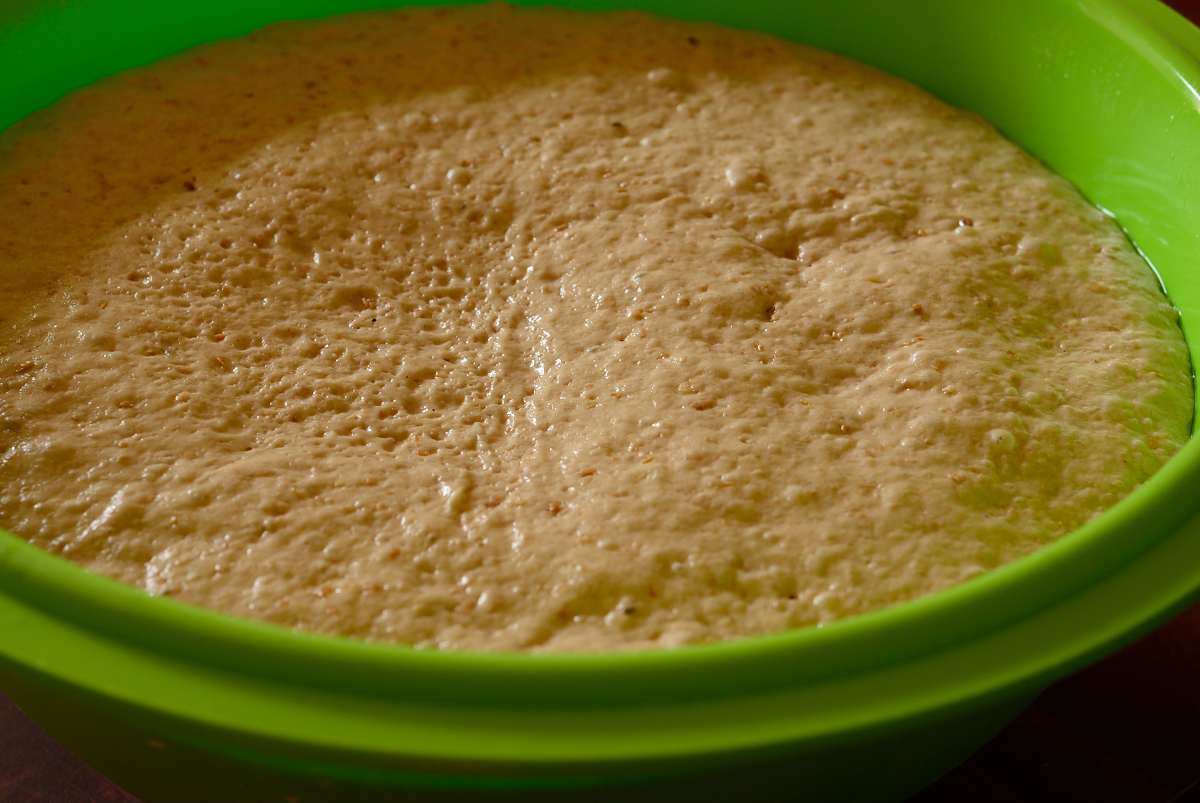
Much volume after the first rise.

So I waited a bit more. My patience eventually paid off. There is no holding back of Mother Nature once she gets going. I saw some small bubbles forming. I waited another day or so, then fed the lot with about three tablespoons of stone ground, whole wheat, unbleached flour.


The results were immediate. Well, almost. The mix doubled in volume within three hours, so I added another half cup full of the same flour. This also took about three hours to double in volume.


Resting nicely after the first rise, looking just  enough.

At this stage I decided that I had a proper yeast. I split the mother into two, feeding each with a cup of flour and some water. Just enough to make a nice runny mix. These were left on the kitchen counter to bubble away merrily. Once these were lively enough to my judgement, one was promptly put in the refrigerator while the other went into my dough mix.


After reading The Bread Baker's Apprentice and Crust and Crumb, both by Peter Reinhart of the Fresh Loaf, I made up a dough with about 75% hydration. For this one I used two cups of rye, two cups of brown bread flour and six cups of white bread flour. Into this went about 40 grams of baking fat and two teaspoons of salt. Since this was to become rusks and not regular bread, I also added about ¾ cup of sugar. Rusks are supposed to be sweet, so I hoped for the best that the yeast will not consume it all!


Roll into small sausages. These differ from normal bread.
And of course, I would be remiss if there was no aniseed seeds in the mix. This was sorted by adding a royal helping of the seeds to the mix. The sourdough was added after mixing the dry ingredients thoroughly. The sourdough constitutes probably 500 ml of the water content, so I adjusted the rest of the water accordingly. This was mixed into the dough, adding the rest of the water. The molten dough was added after letting the basic mix rest for five minutes. No kneading yet!


After mixing the lot in, I kneaded the dough until it became silky to the touch, then left it to rest for ten minutes. The dough was still reasonably soft. This was patted with oil on the hands, then stowed in the large covered mixing bowl in the cold oven.


This lot was left to ferment overnight. It is really cold here at present, the day temperature inside the house being in the order of 17ºC/63ºF. So I reasoned that the dough will ferment slowly. I was right. The dough triple in volume overnight, which was good. The rest of the processing reduces the volume again, so there is time for a second rise.


Decent notes help to give you proper proportions of ingredients
This is where the making of rusks deviates from the bread making process. The dough is tipped gently out on to a floured kneading board and left to rest for twenty minutes. Then it is rolled into a snake just over 30mm thick (a bit over an inch for my other friends). This snake is cut into two inch sections , rolled into a ball , then rolled into a short sausage again before being stacked in a baking tin. This ensures that the pieces can be broken off after baking. Perhaps this is akin to making dinner rolls, except you pack these tight.


Leave these infant rusks to rise for another hour or so, until double the volume. Then dab some egg and milk wash on top before baking them at 175ºC/350ºF for thirty minutes. I spritzed the oven with water at the start, then twice again at five minute intervals. At twenty minutes I turned the baking tins around to get an even bake on the tins.

Pack tightly in the baking tray.  Neatness not really required!
At thirty five minutes the rusks were removed from the oven and left to cool. This part of the process is the same as for bread. The dough is still cooking for at least forty minutes after removal from the oven, as it is filled with steam.

Once cooled down, the rusks are broken apart and spread on a baking tray for drying. I dry mine at 125 175ºC/250ºF, just a tad over boiling point.  Two hours should see them nice, crisp and dry. This ensures good evaporation and some tanning to boot. We have no use for pale white rusks in this house! These are stored in a cake tin or plastic container away from humidity. They will soak up humidity like anything.


Especially coffee. They were designed to soak up coffee.

Voila, behold, your sourdough rusks!

Fully laden roaster
This was the first time I really paid attention to the relative quantities of ingredients in the dough. This is thanks to Peter Reinhart's admonishments! But jokes aside, I now am getting repeatable results. Predictable results, even without measuring internal temperatures or controlling the environment for any of the pre-ferment or the final proofing. It just shows what a little attention to detail can accomplish.

I would leave out some of the fat from this recipe next time I want to make rusks. Rusks are dry and as such will last a long time anyway. The fat will keep loaves fresh in bread form, so there is already a design difference. The rye also makes them a bit on the sour side, perhaps, so I shall leave out the rye altogether for rusks.

The rye contains less gluten than other flours and as a result you may find that the dough rises less than dough made with other flours. This will result in a more dense crumb. The extra density is not altogether unwanted in rusks. But the amount of handling and forming before the second rise will take care of that, resulting in a more dense crumb anyway. So the rye does not really add much to the end result.

Check for even baking, Wash with egg and milk mix.
Whatever you choose to do, these rusk soak up coffee as advertised and taste good too. Especially with the added aniseed flavour.


This post also linked to Yeastspotting!


Authored by Johan Zietsman.


Last updated on 2013-08-18
Break loaf into rusks after cooling, then dry them.

Monday 5 August 2013

Is Light Sourdough Bread A Myth?


Perhaps the holy grail of all bakers: how to make a light loaf. This prize has been escaping me for a while now. Even after extensive consultation and blatant, overt picking of brains, my loaves came out on the heavy side. Whatever yeast I was using, the problem remained. Sometimes the loaves did come out reasonably light, but not light enough to my taste.

That is, until two days ago. I reasoned that the problem did not lie in my understanding of the oven and heat flow, nor was it vested in the ingredients. Therefore the problem had to lie in the process. So I sat myself down and started thinking.


...Read More...


Authored by Johan Zietsman.

Reposted from The Hungry Sailor on 2013-08-05

Baking Sourdough Ciabatta After Consulting My Baker Gurus


Perhaps I should have called this post 'Making Headway Against The Vagaries of A wild Sourdough.' But this is not a lamentation.

I actually have two experienced bakers to consult. Not too shabby. So between the two sets of advice and my trusted copy of Classic Sourdoughs, Revised by Ed Wood and the late Jane Wood, I set out on my next affray into the wonderful world of baking with sourdough.

I have the oven temperature and the spritzing with water under proper control. Ditto for the dough mix. And I am getting a wonderful fermentation of the starter as well as the main rise. I mix about a cupful of the mother with another cupful of flour for the starter, adding just enough water to make the starter somewhat runny. I go with personal judgement on quantities; this is worth about two cups of dough in the final mix, so I am not too worried about exact quantities.


...Read more...


Authored by Johan Zietsman.

Reposted from The Hungry Sailor on 2013-08-05

Fresh rolls on the griddle


I recently had a few bright moments. At least, I think I had. Those moments when you are overcome with a sudden surge of hate for the daily drudgery and just knowing that it is time for something else.

In this instance I had the idea of shaking off all the ingrained inhibitions of a blogger of carefully planning, inventing and preparing a dish. Reworking the recipe and so on.

Drudgery at its best.

We have a regular Wednesday night braai (barbecue for my overseas friends) at the local yacht club.  “We” being a circle of friends and fellow sailors. There we literally share the food. One piece of meat is cooked at a time, whether it be sausage or a well matured steak. This is then cut into bite size slices and dished out. Then the next piece of meat goes on the griddle. And so on. Rather like a very South African dry fondue, if you will.


...Read more...


Authored by Johan Zietsman.


Reposted from The Hungry Sailor on 2013-08-05